
Welcome to the Delta 6-in-1 crib assembly guide! This versatile crib transitions from a baby crib to a toddler bed‚ daybed‚ and full-size bed‚ offering long-term value. Follow these instructions carefully to ensure safe and correct assembly‚ maximizing your product’s benefits for years to come.
Overview of the Crib’s Features and Benefits
The Delta 6-in-1 crib is a versatile‚ adjustable‚ and safe sleeping solution for your baby. It converts seamlessly from a crib to a toddler bed‚ daybed‚ and full-size bed‚ offering years of use. The crib features adjustable height settings‚ ensuring it adapts to your child’s growth. Its sturdy construction and classic design provide both safety and style. The crib includes a toddler rail for easy conversion and meets all safety standards. With its 6-in-1 functionality‚ this crib is a practical and cost-effective choice for parents‚ combining durability‚ versatility‚ and timeless appeal. It’s designed to grow with your child‚ ensuring long-term value and convenience.
Importance of Following the Assembly Instructions
Following the Delta 6-in-1 crib assembly instructions is crucial for ensuring your child’s safety and the product’s durability. Proper assembly prevents structural issues‚ such as wobbly frames or loose parts‚ which could lead to accidents. The instructions are designed to meet safety standards‚ and deviations may result in hazards like entrapment or injury. Additionally‚ incorrect assembly could void the warranty or compromise the crib’s longevity. Always read the manual thoroughly‚ use the recommended tools‚ and double-check each step. This ensures a secure and stable crib for your baby‚ providing peace of mind for years to come.
Preparation for Assembly
Ensure a clean‚ flat workspace. Gather tools like an Allen wrench and screwdriver. Organize hardware and parts from the box. Follow safety precautions for assembly.
Safety Precautions and Warnings
Always prioritize your child’s safety during assembly. Ensure the area is clear of hazards and follow instructions carefully. Adult assembly is required due to small parts. Avoid using strings or loose bedding‚ as they pose a strangulation risk. Never add extra padding under the mattress‚ as it can create a suffocation hazard. Keep all hardware and screws out of your child’s reach. Double-check all bolts and connections for tightness before use. Failure to follow these precautions and the provided instructions may result in serious injury or death. Regularly inspect the crib for stability and damage to ensure a safe environment for your child.
Tools and Materials Required for Assembly
To assemble the Delta 6-in-1 crib‚ gather the necessary tools and materials beforehand. You will need an Allen wrench (provided) for tightening bolts and screws. Additional tools include a screwdriver for securing hardware and a wrench for ensuring tight connections. All required bolts‚ pins‚ and metal frames are included in the package. Double-check the contents against the manual to confirm no parts are missing. Organize the hardware by size and type to streamline the process. Ensure the assembly area is flat and stable to prevent accidents. Keep all small parts out of your child’s reach to avoid choking hazards. Proper preparation will ensure a smooth and safe assembly experience.
Step-by-Step Assembly Instructions

Begin by assembling the crib frame‚ then attach the side bars and wheels. Secure the bed board and mattress support. Follow the manual for detailed guidance and conversions.
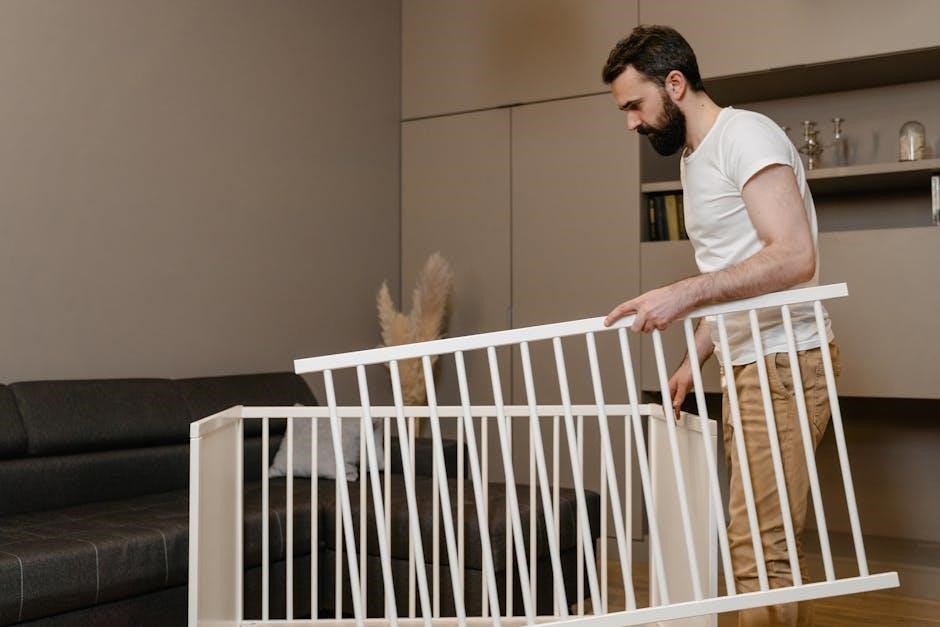
Assembling the Crib Frame and Base
Start by unpacking and organizing all components. Use the Allen wrench to tighten the bolts securing the crib frame. Attach the legs to the base‚ ensuring they are evenly aligned. Next‚ connect the side rails to the frame using the provided M6 x 55 mm bolts. Tighten firmly but avoid overtightening. Align the bed board with the frame’s brackets and secure it with the shorter bolts. Double-check all connections for stability. Ensure the base is level and the frame is sturdy. Refer to the manual for specific bolt locations and torque guidelines. Proper assembly is crucial for safety and durability.
Attaching the Side Bars and Wheels
Once the crib frame and base are assembled‚ proceed to attach the side bars. Use the Φ4×30 mm metal pins to secure the left and right crib sides (Parts H and J) to the frame. Tighten the pins firmly to ensure stability. Next‚ install the wheels by aligning them with the pre-drilled holes on the base. Use the M6 x 55 mm bolts to fasten the wheels in place. Ensure the wheels are evenly spaced and tightly secured. Double-check the alignment to prevent any wobbling. Properly attached side bars and wheels ensure the crib is both stable and mobile‚ enhancing its functionality and safety for your child.
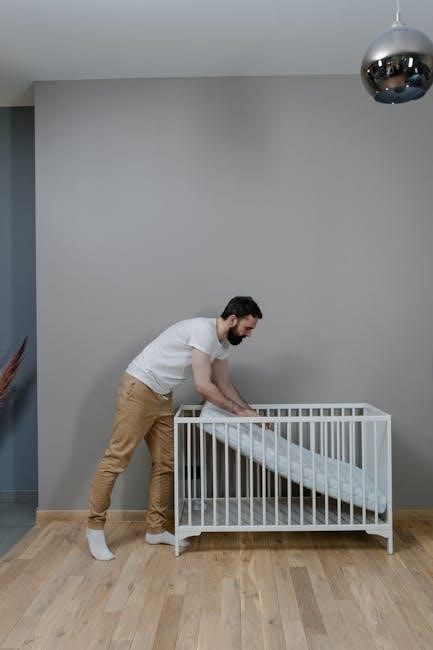
Securing the Bed Board and Mattress Support
After assembling the crib frame‚ position the bed board on top‚ ensuring it aligns flush with the frame. Use the provided Φ4×30 mm metal pins (Part S) to secure the bed board to the frame at the designated holes. Tighten firmly to prevent any movement. Next‚ attach the mattress support using the M6 x 55 mm bolts. Ensure all bolts are tightened evenly to maintain a sturdy surface. Double-check that the bed board and mattress support are level and secure. Proper installation ensures the crib is safe and stable‚ providing a comfortable sleeping surface for your baby. Always ensure tightness before placing the mattress inside.
Converting the Crib to a Toddler Bed
Transition your Delta 6-in-1 crib to a toddler bed by removing the crib rail and adjusting the height. Attach the toddler rail for added stability and safety.
Removing the Crib Rail and Adjusting the Height
To convert the crib to a toddler bed‚ start by removing the crib rail. Use an Allen wrench to detach the rail from the side panels. Gently pull the rail away from the frame. Next‚ lower the crib’s height adjustment mechanism to the toddler bed setting. Ensure the mattress support is securely locked in place. Double-check all connections for stability. This step ensures the bed is safe and accessible for your toddler‚ promoting independence while maintaining safety standards. Properly adjusting the height and removing the rail are critical for a smooth transition. Always refer to the manual for specific hardware locations and torque specifications to avoid errors. This ensures a sturdy and secure toddler bed setup.
Attaching the Toddler Rail and Ensuring Stability
Once the crib rail is removed‚ attach the toddler rail to the crib frame. Align the rail’s pre-drilled holes with the frame’s mounting points. Secure it using the bolts provided in the hardware kit. Tighten firmly with an Allen wrench to ensure stability. Double-check that the rail is evenly aligned and all bolts are snug. Test the bed by gently rocking it to confirm there is no wobble. Ensure the mattress is at the correct height for your toddler’s safety. Proper installation of the toddler rail is essential to prevent tipping and ensure a secure transition. Always refer to the manual for specific bolt locations and tightening sequences. This step guarantees a safe and stable toddler bed. Regularly inspect the connections to maintain safety over time.

Converting the Crib to a Full-Size Bed
Attach the bed frame extension and support legs to the crib base. Secure the bed rails to the sides‚ ensuring proper alignment and stability. Tighten all bolts firmly for a sturdy full-size bed configuration.
Adding the Bed Frame Extension and Support Legs
Begin by unpacking the bed frame extension and support legs from the provided hardware. Align the extension with the crib base‚ ensuring proper fitment. Secure it using the M6 x 55 mm bolts‚ tightening firmly to avoid any wobble. Next‚ attach the support legs to the extension‚ positioning them evenly for stability. Use the Allen key to tighten the bolts‚ ensuring they are snug but not over-tightened. Double-check the alignment to maintain the bed’s structural integrity. Refer to the manual for specific torque recommendations. This step is crucial for transitioning the crib into a sturdy full-size bed configuration.
Securing the Bed Rails and Final Adjustments

Attach the bed rails to the sides of the full-size bed frame using the M6 x 55 mm bolts‚ ensuring they align perfectly with the pre-drilled holes. Tighten the bolts securely‚ but avoid over-tightening to prevent damage. Double-check the alignment of the rails and frame for proper fitment. Once the rails are in place‚ perform a stability test by gently rocking the bed to ensure there is no wobble. Make any necessary adjustments to the legs or bolts for even support. Finally‚ inspect all connections to confirm they are snug and secure‚ providing a sturdy foundation for the mattress. This completes the conversion to a full-size bed.

Maintenance and Troubleshooting
Regularly inspect the crib for loose bolts or scratches. Clean with mild soap and water‚ avoiding harsh chemicals. Address any wobbling by tightening hardware. Refer to the manual for troubleshooting common issues and replacement parts guidance to ensure long-lasting durability and safety.
Cleaning and Inspecting the Crib for Safety
Regular cleaning and inspection are crucial for maintaining your Delta 6-in-1 crib’s safety and longevity. Use a soft cloth and mild detergent to wipe down all surfaces‚ avoiding harsh chemicals that could damage the finish. Inspect for loose screws‚ dents‚ or cracks‚ and tighten any hardware promptly. Check for wear on moving parts like wheels and hinges. Ensure the mattress support is secure and the bed board is properly attached. Replace any worn-out components immediately. Always refer to the manual for specific care instructions to keep your crib safe and functional for years to come.
Addressing Common Assembly Issues
If you encounter issues during assembly‚ start by double-checking all parts against the inventory list to ensure nothing is missing. Misaligned holes or screws that won’t fit may indicate incorrect part orientation. Refer to the manual’s diagrams for proper alignment. If wheels or side bars won’t attach‚ verify they’re intended for your crib model. For stability concerns‚ ensure all bolts are tightened evenly. Consult Delta’s customer support for clarification or replacement parts. Keep the assembly area organized to avoid losing small components. Patience and careful adherence to instructions will help resolve most issues efficiently.

Congratulations on completing your Delta 6-in-1 crib assembly! Ensure all safety checks are performed for your baby’s well-being. For further assistance or replacement parts‚ visit Delta’s official website or contact their customer support team.

Final Safety Checks and Tips for Longevity
After assembling your Delta 6-in-1 crib‚ perform a final safety check. Ensure all bolts and screws are tightly secured‚ and there are no gaps between parts. Verify the mattress fits snugly‚ leaving no space between it and the crib walls. Regularly inspect for wear and tear‚ addressing any issues promptly. For longevity‚ clean the crib with mild‚ non-toxic detergents and avoid exposing it to excessive moisture. Store the assembly manual for future reference. Delta Children also offers online resources and customer support for any post-assembly concerns. By following these steps‚ you’ll ensure your crib remains safe and durable for years to come.
Where to Find Replacement Parts and Support
For any replacement parts or assistance with your Delta 6-in-1 crib‚ visit Delta Children’s official website. They offer a comprehensive support section with downloadable manuals‚ assembly guides‚ and troubleshooting tips. You can also contact Delta Consumer Care directly through their website or by phone for personalized assistance. Additionally‚ replacement parts are available for purchase on their site or through authorized retailers. Ensure to use only genuine Delta parts to maintain safety and warranty validity. For further inquiries‚ refer to the contact information provided in your assembly manual. Delta Children is committed to providing reliable support to ensure your crib remains safe and functional.